

After years of following the developments on Reprap and dreaming of building my own machine, I settled with buying a kit from this fine seller. I went for the ANET A8 with auto-leveling which was only €160, including fast shipping from Germany.
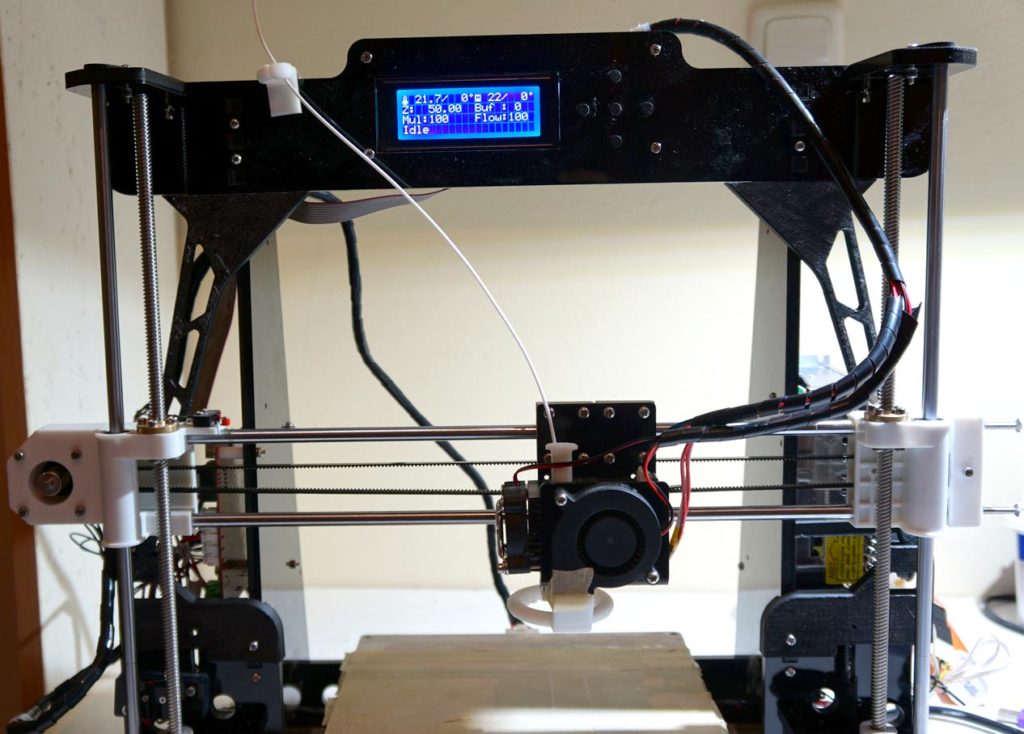
Now, this is a kit, meaning it comes in bits and pieces and one has to do the assembly and wiring oneself. It’s not meant for people without some technical abilities and patience. It took about one day to put together, but everything was in the package, and I had no difficulties with the provided instructions and enough information online. I didn’t mount the auto-leveling sensor from the beginning, since I wanted to learn the manual bed leveling well, before letting the machine take that function over.
Having done some research while waiting for the package to arrive, I already had a list of improvements that I deemed necessary. So I spent the first few weeks basically just getting used to the machine and printing things for the printer itself. I had read a few horror stories where ANET printers were supposed to have burned down entire houses, so I made sure I properly crimped all the cable connections well.
Among the most useful resources I found, is the great community on thingiverse, and you can find me here. As extra parts for the ANET A8 go, first of all, one needs an extruder button to protect the fingers when changing filament, a better nozzle fan guide to properly cool the extruded filament, and a filament guide to make sure the filament does not wiggle around too much.
The 10 m filament that came free with the kit run out pretty quickly, and I found this fine seller in my city (Athens, Greece), which provides a very cheap but good range called Athena PLA.
The next few improvements were the “Hulk” Frame Brace to provides some extra stability and potentially reduce artifacts, an X-belt tensioner and a Y-Belt tensioner which enable tensioning the belts, which also potentially reduces artifacts.
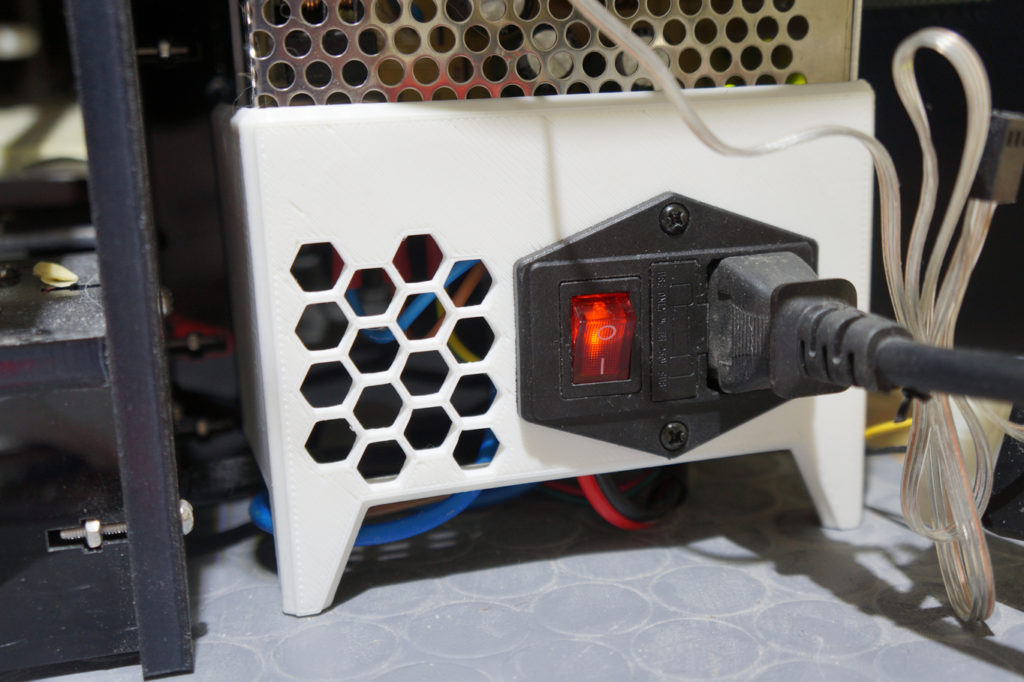
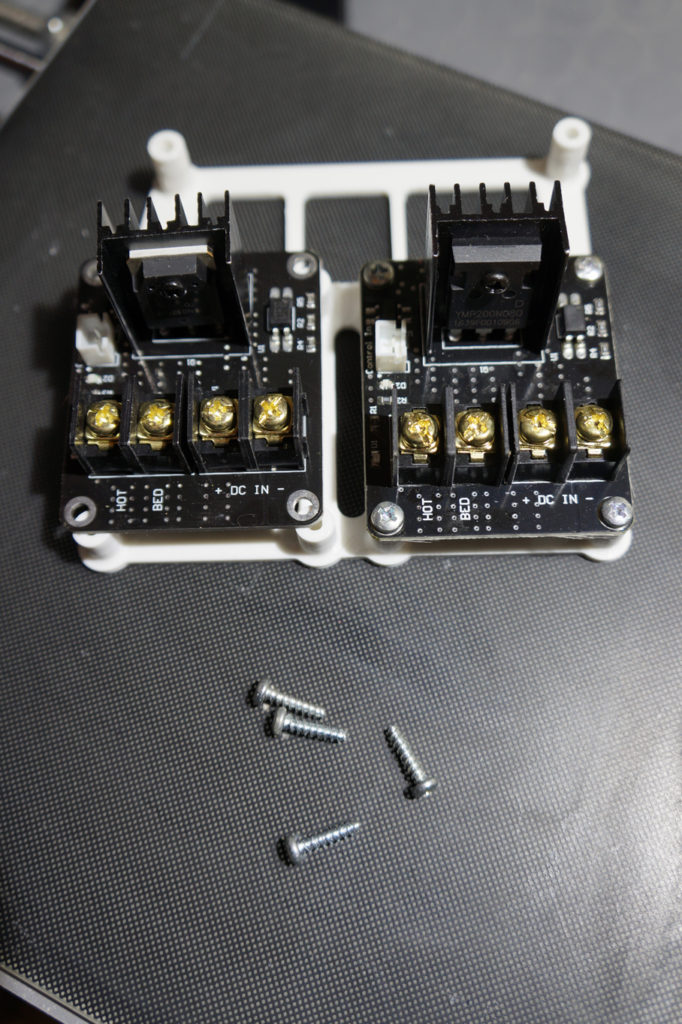
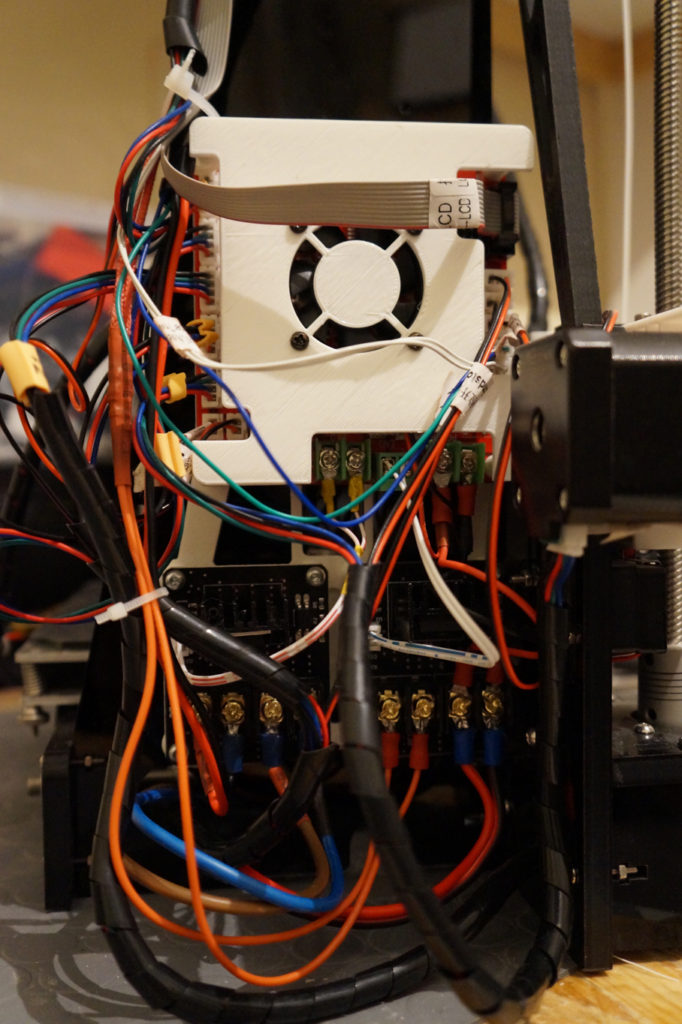
More parts to improve the machine were a PSU fan holder to keep the PSU cool and running for longer prints, a pretty honeycomb power supply cover with a suitable plug and switch since the ANET A8 does NOT come with either a plug or a power switch, a main-board cover with 40/50mm fan to keep the main-board from frying (been there, done that, so learn from my mistakes), and a dual MOSFET mount to move the power switching and the corresponding stresses away from the expensive main-board.
The filament base provided by ANET was not ideal, so I opted for the TUSH Spool Holder which works really well, and the spools are far more easy to change. Unless you go through it super-fast, the filament may stay on the spool for some time gathering dust, which dust you really don’t want in your final prints. A filament filter is really handy to prevent that from happening. Filament clips are also handy to prevent the spools from unwinding when stored.
A few months of heavy use, and the ANET A8 will definitely show it’s flaws. Order some extra nozzles, some extra throats, some extra heating elements, and some extra lengths of belts, as those are parts you should keep replacements for.
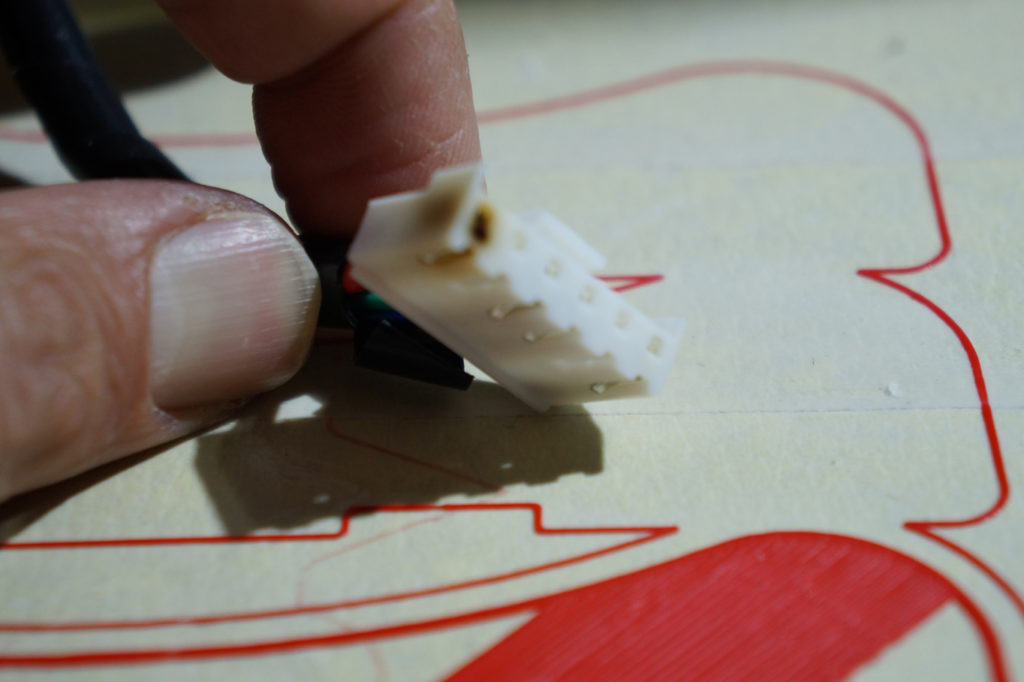
One thing that almost certainly will go wrong is the connector to the heated bed. As the current on this part is way above it’s specifications, it gradually burns out, potentially being a fire hazard. Eventually I just removed the connector and soldered the wires directly to the pads on the heated bed, covering the joints with high-temperature epoxy, and forming a strain relief with high-temperature gasket silicone to protect them.
All in all, 3D printers are amazing machines and really useful to have around, but make sure you’re up to the task, and be prepared to show patience… a lot of patience!